

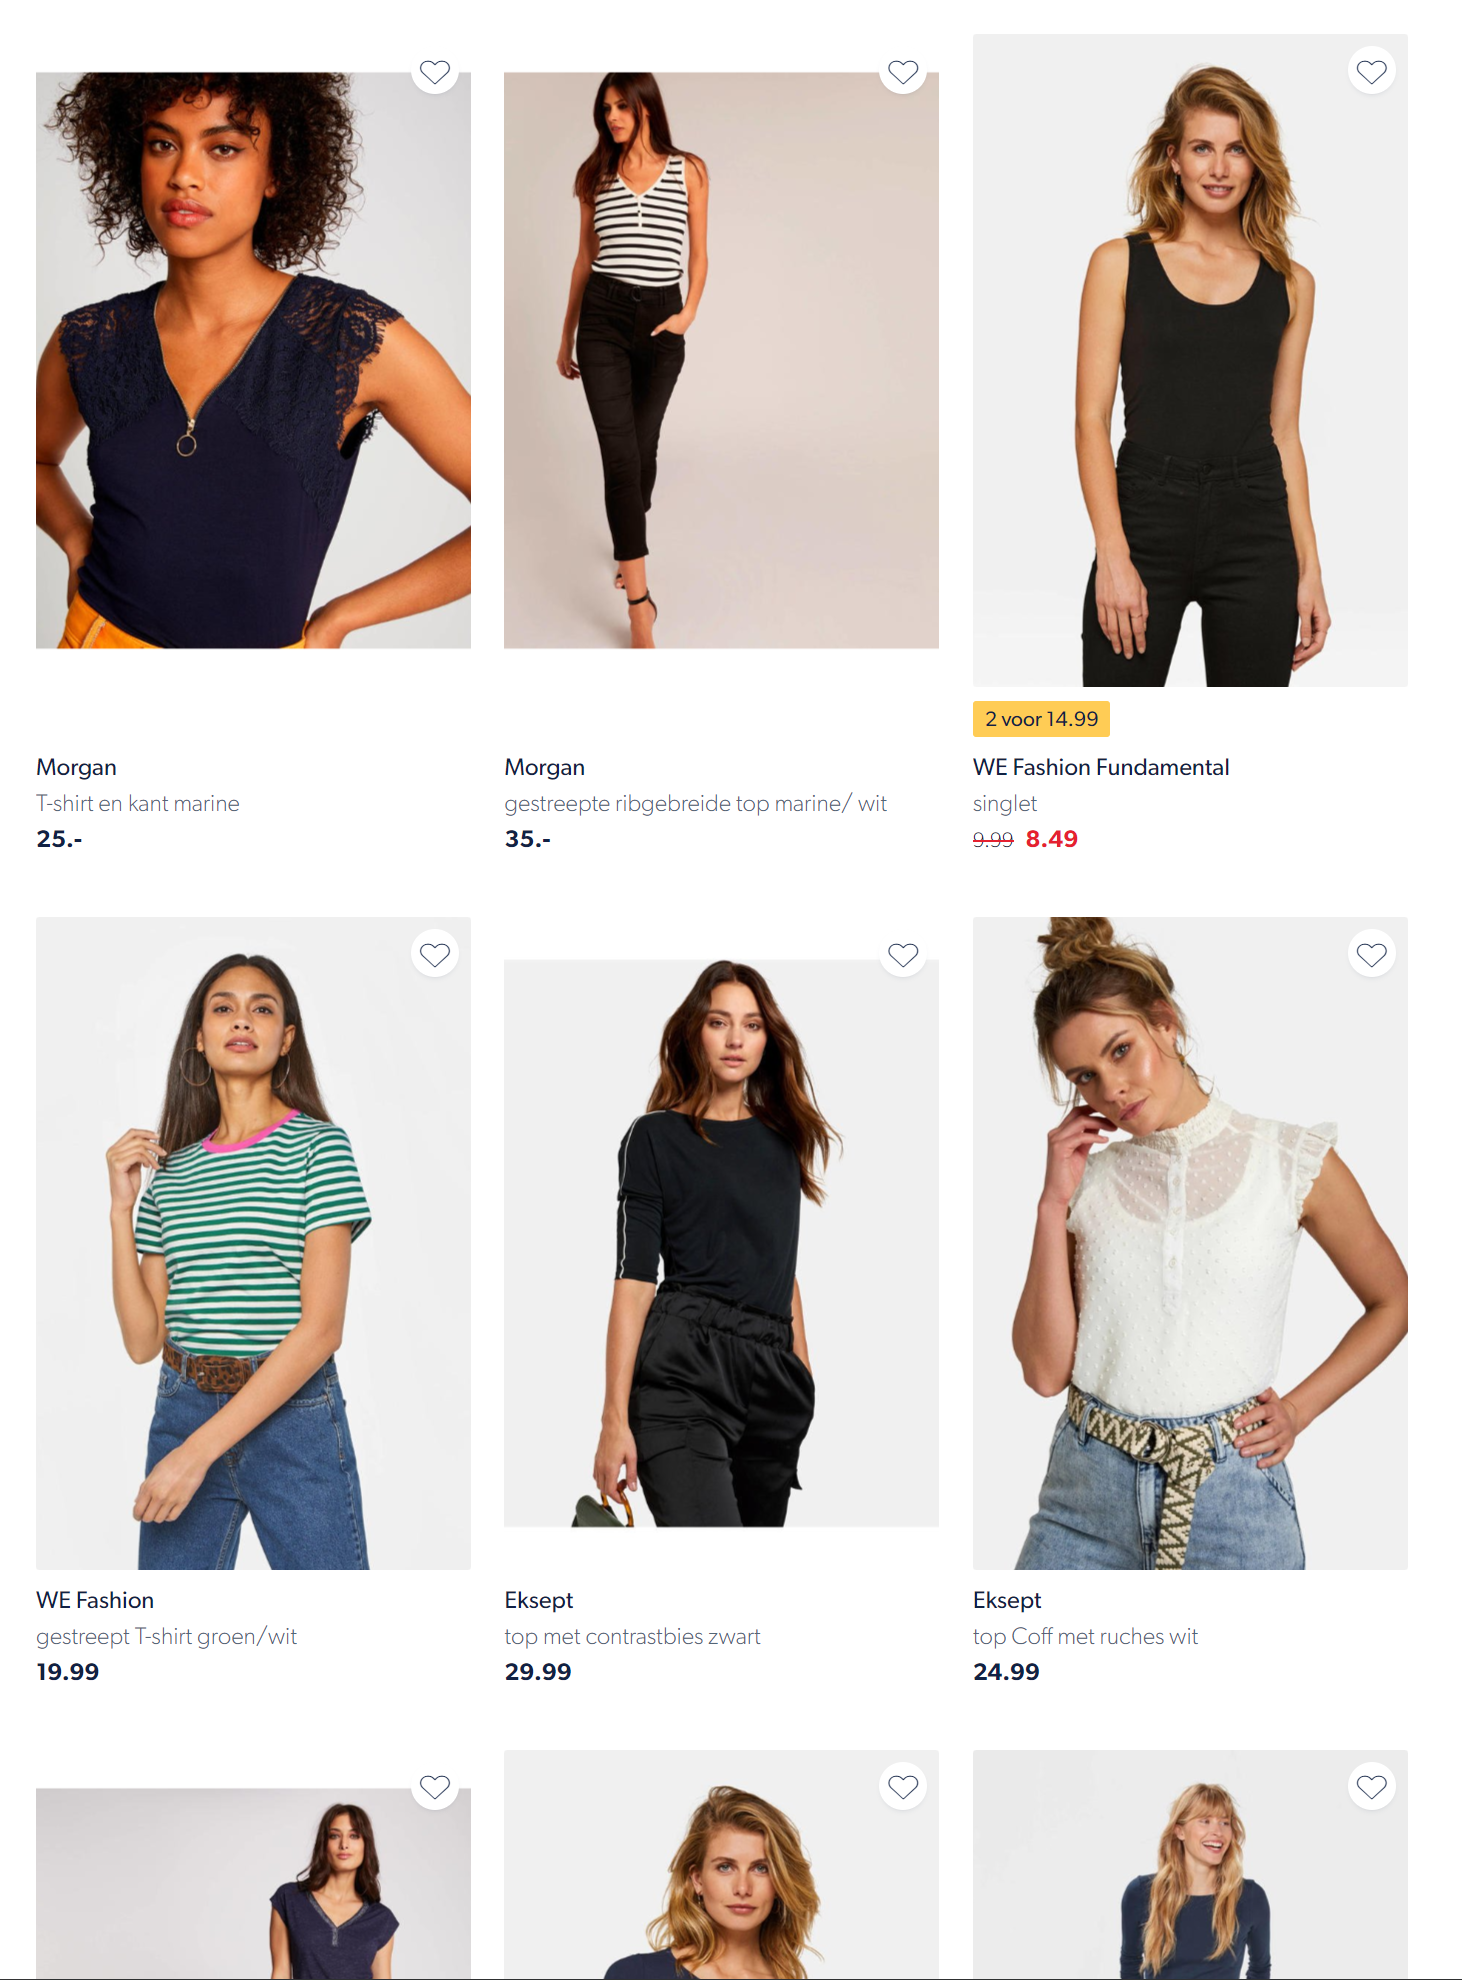
We love to use model images at Wehkamp. This year we've switched from overviews with product images to overviews with model images. A lot of photography is shot by our own photo studio. I love this, because it gives us control over the process and the tone. But as our assortment grows, it is not feasible to shoot all the products on our website. That is why we use images from our suppliers. Unfortunately, we have no control over the conditions of the photo. This can lead to overviews that do not look optimal:
Let's see if we can crop these images to 2:3 with Pillow, a Python library for parsing images.
Remove white bars
Some images have white bars on the top and bottom. To get a better image, we need to remove the bars first. But we need to be careful, because some backgrounds are all white; when we remove those bars, the image will get worse. Here is a sample of these images:

What is white?
The RGB value for a white pixel is (255, 255, 255). To make things a little more resilient, let's work with minimal value 250. Let's define some functions that can determine if a row or a column of pixels is within a range.
from typing import Tuple
from PIL.Image import Image as PilImage


def is_in_color_range(px: Tuple[int, int, int], minimal_color:int) -> bool:
    return px[0] >= minimal_color and px[1] >= minimal_color and px[2] >= minimal_color


def is_line_color_range(im: PilImage, y: int, minimal_color: int) -> bool:
    width, _ = im.size

    for x in range(width):
        px = im.getpixel((x, y))
        if not is_in_color_range(px, minimal_color):
            return False
    return True


def is_column_color_range(im: PilImage, x: int, minimal_color: int) -> bool:
    _, height = im.size

    for y in range(height):
        px = im.getpixel((x, y))
        if not is_in_color_range(px, minimal_color):
            return False
    return True
Taking a color that is less than 250 helps to chop off soft blurred white lines in JPEG encoded images that have been scaled down.
Bar detection
Using the functions above, we can detect the white bars in an image. If the image has a left white bar, we will skip the image.
def remove_bars(im: PilImage, minimal_color: int) -> Tuple[PilImage, bool]:

    width, height = im.size
    top = 0
    bottom = height-1

    # if left border is the same color -- skip, because we have no bars
    if is_column_color_range(im, 0, minimal_color):
        return im, False

    # calc white pixel rows from the top
    while is_line_color_range(im, top, minimal_color):
        top += 1

    # calc white pixel rows from the bottom
    while is_line_color_range(im, bottom, minimal_color):
        bottom -= 1

    # no white bars detected
    if top == 0 or bottom == height-1:
        return im, False

    # crop based on bars
    bbox = (0, top, width, bottom + 1)
    return im.crop(bbox), True
When we plug 250 as minimal_color we get the following result:

A model-only crop
Now that we have removed the white bars, we can try to calculate a crop box of the model.
Crop by pixel color
Most model photography contains a neutral background. Let's use Image Channel Operations to get a crop box based on the background color:
from typing import Tuple
from PIL import ImageChops
from PIL.Image import Image as PilImage

def get_crop_box_by_px_color(
    im: PilImage,
    px: Tuple[int, int, int],
    scale: float,
    offset: int) -> Tuple[int, int, int, int]:

    bg = Image.new(im.mode, im.size, px)
    diff = ImageChops.difference(im, bg)
    diff = ImageChops.add(diff, diff, scale, offset)
    return diff.getbbox()
It might be hard to understand what is happening in this function. So here is a visualization of those stages:

difference and add.Crop by top/left and bottom/right pixel
To make things more resilient, we will check for the top/left and bottom/right pixels and check if the color is within the "background" color range.
from typing import Tuple
from PIL.Image import Image as PilImage

def crop_by_background(
    im: PilImage,
    minimal_light_background_color_value: int) -> Tuple[int, int, int, int]:

    width, height = im.size
    original_box = (0, 0, width, height)

    # crop by bottom-left pixel color
    px = im.getpixel((0,height-1))
    if is_in_color_range(px, minimal_light_background_color_value):
        bbox1 = get_crop_box_by_px_color(im, px, 2.0, -100)
    else:
        bbox1 = original_box

    # crop by bottom right pixel color
    px = im.getpixel((width-1,height-1))
    if is_in_color_range(px, minimal_light_background_color_value):
        bbox2 = get_crop_box_by_px_color(im, px, 2.0, -100)
    else:
        bbox2 = original_box

    crop = (
        max(bbox1[0], bbox2[0]),
        max(bbox1[1], bbox2[1]),
        min(bbox1[2], bbox2[2]),
        min(bbox1[3], bbox2[3])
    )

    return crop
Let's take some 10 sample images and convert them:

I've removed the white borders and drawn a red cropping rectangle on it:

Expanding the model crop to 2:3
Now that we have the model crop box, we can use it to expand (or contract) the box to a 2:3 ratio crop. The constraint of the box is basically the height and the width of the image. We will try to use the center of the model crop as the center.
The following method will try to see if we can make a 2:3 crop box based on the full height of the image. It will shift the box if it goes outside the area of the original image.
from typing import Tuple, Union

def calculate_optimal_crop(
        im_width:int,
        im_height:int,
        inner_rect: Tuple[int, int, int, int],
        ratio: float
) -> Union[Tuple[int, int, int, int], None]:

    im_ratio = im_width / im_height

    # not all images have to be cropped
    if im_ratio == ratio:
        return None

    left, upper, right, bottom = inner_rect

    # calculate with with max height
    height = im_height
    width = im_height * ratio

    # crop width
    if width <= im_width:
        c_left, c_right = expand(left, right, width, im_width-1)
        c_upper = 0; c_bottom = height-1

    # crop height
    else:
        width = im_width
        height = int(im_width / ratio)
        c_upper, c_bottom = expand(upper, bottom, height, im_height-1)
        c_left = 0; c_right = im_width-1

    return (c_left, c_upper, c_right, c_bottom)


def expand(m1: int, m2: int, value: int, max: int) -> Tuple[int, int]:

    value = int((value - (m2-m1)) / 2)
    m1 -= value; m2 += value

    if m1 < 0:
        m2 += abs(m1); m1 = 0
    elif m2 > max:
        m1 -= m2 - max; m2 = max

    return m1, m2
Let's draw both crop boxes over our sample of 10 images:

When we use the result of the crop calculation, we get these crops:

Final thoughts
Cropping model photography in 2:3 gives a consistent overview of tiles. This blog shows how easy it is to crop an image based on a model when the background is neutral. We could even go 1 step further and that is harmonizing the backgrounds of these images! Who knows, maybe a next blog could be about that.
Remember the overview at the beginning of the blog? Here you can compare the difference:


Further reading
This might also interest you: