

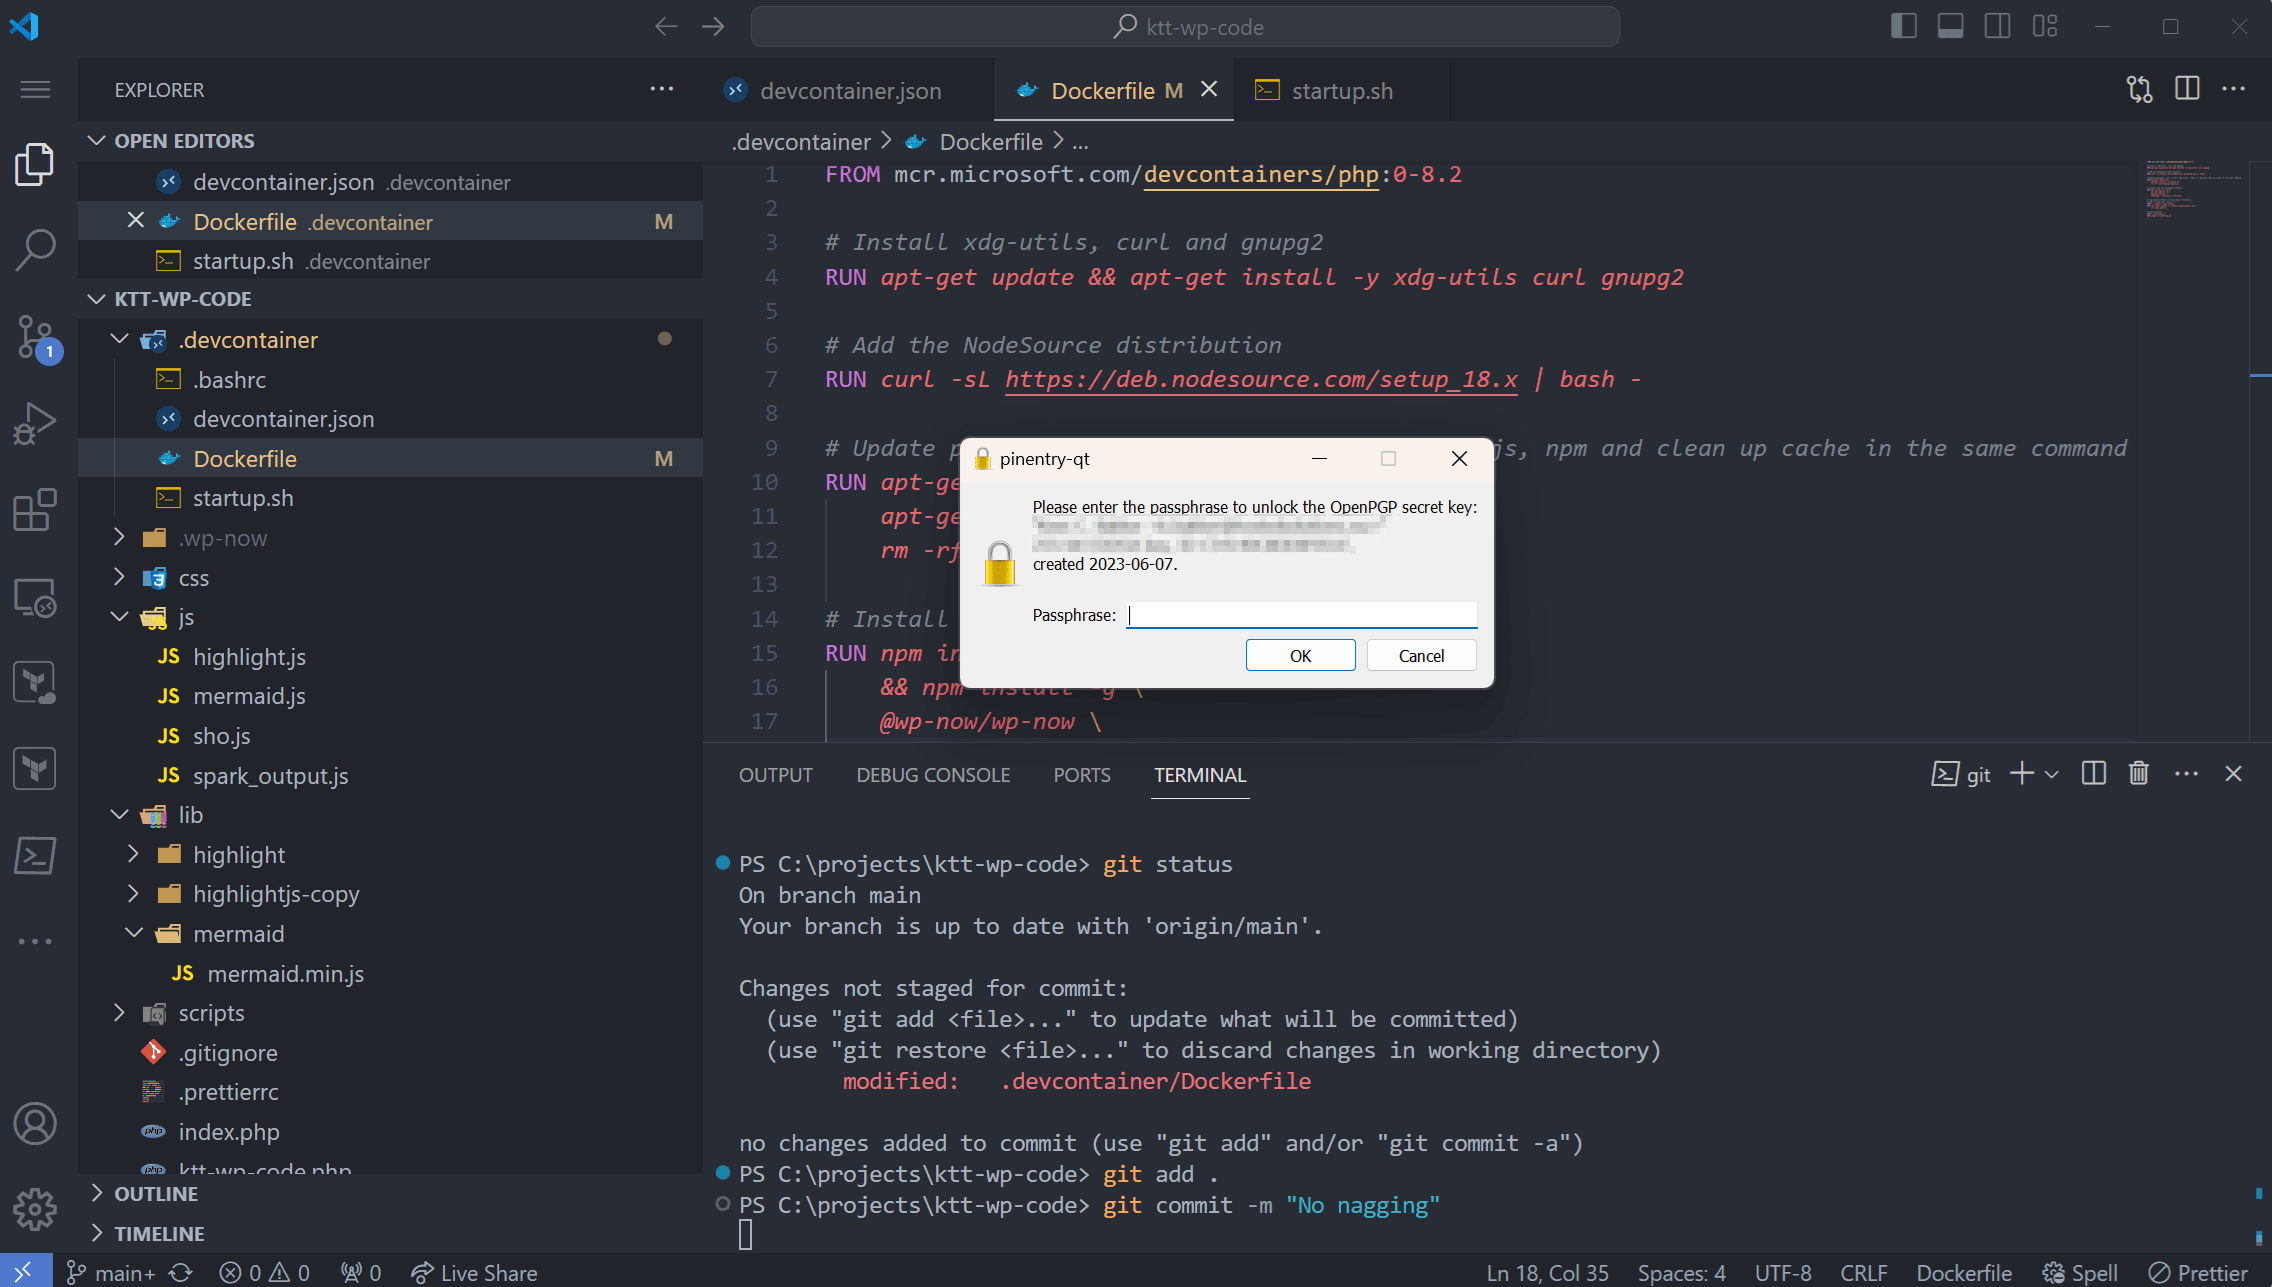
Let's setup git commit verification using GPG on Windows. This will prompt us to sign the commit. I will be using a passphrase instead of signing the commits with my SSH token. This gives an extra layer of security to the setup.
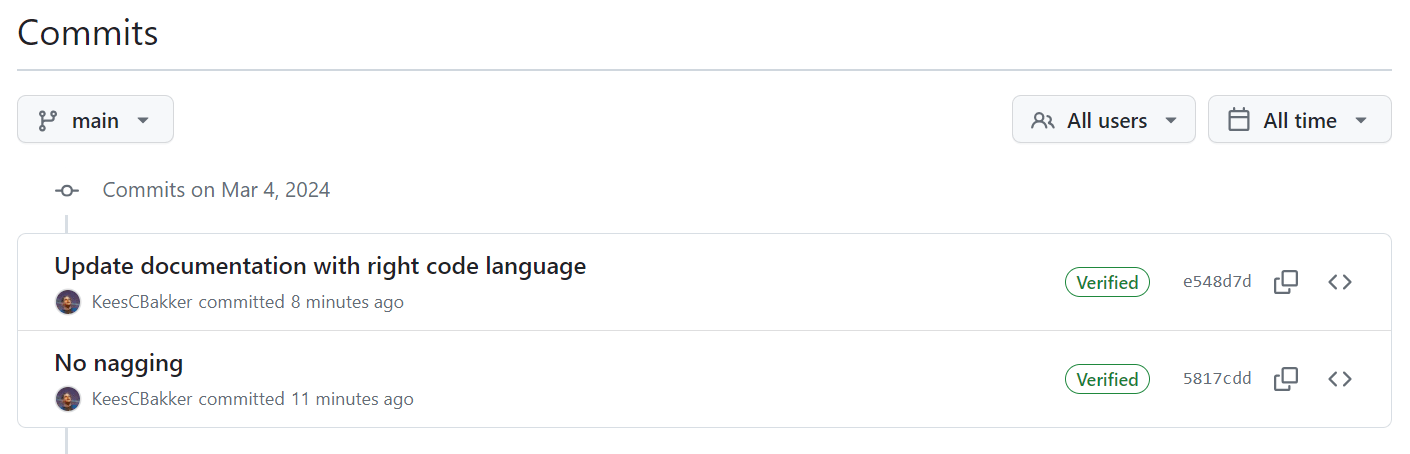
Signed commits will show the green verified label in GitHub:
What does GPG mean?
GNU Privacy Guard, or GPG, helps with signing messages:
GPG is a collection of tools that allow signing and encrypting of data using asymmetric cryptography (with public / private keys). Git uses GPG to sign and verify commits and tags. With such a signature, you can easily verify that a commit (or tag) was really made by a specific user.
git-tower.com
If you check one of the previous screenshots you'll notice the term OpenPGP, which stands for Open Pretty Good Privacy. GPG is an implementation of OpenPGP:
One of the original implementations of PGP, also called PGP, was fully owned by the PGP Corporation. The latter is now owned by Symantec, which in turn is a part of Broadcom.
However, OpenPGP is now an international standard as defined in the latest RFC 4880 – OpenPGP Message Format.
[…]
On top of the standard and optional OpenPGP featureset, GPG provides several improvements: versatile key management system, frontend applications and libraries, and fully ported to Microsoft Windows as Gpg4win.
Baeldung
Step 1: Gpg4win installation
We'll be using Gpg4win. You can install Gpg4win by downloading it, or do the install with Chocolatey from an elevated PowerShell:
choco install gpg4winStep 2: generate GPG key
The following steps will guide you thought the UI to create a new GPG key:
- Start Kleopatra
- Click the New Key Pair button
- Enter your Name and Email address. Tick the Protect the generated key with a passphrase box.
- Optional: disable valid until by clicking the Advanced Settings... and untick the Valid until box. Click OK.
- Click OK again.
- Enter your passphrase.
- Done.
Step 3: add GPG key to GitHub
First, we'll export the key to the clipboard:
# get the GPG key
$key=$(
  gpg --list-secret-keys --keyid-format LONG `
  | Select-String -Pattern "ed25519/([^ ]+)" `
  | ForEach-Object { $_.Matches.Groups[1].Value } `
)

# export key
gpg --armor --export "$key" | Set-Clipboard; `
echo "Key exported to clipboard"
Now we can add it to our GitHub profile:
- Open your keys in your profile on GitHub: https://github.com/settings/profile
- Click the New GPG Key button.
- Enter a Title for the paste the clipboard into the Key field.
- Click Add GPG Key.
GitHub will now understand your signed commits.
Local git configuration
Now, let's configure the local git with the following PowerShell script:
# get the GPG key
$key=$(
  gpg --list-secret-keys --keyid-format LONG `
  | Select-String -Pattern "ed25519/([^ ]+)" `
  | ForEach-Object { $_.Matches.Groups[1].Value }
)

# get the location of gpg
$program=$(Get-Command gpg).Source

# config git
git config --global commit.gpgsign true
git config --global user.signingkey "$key"
git config --global gpg.program "$program"
Your commits on your dev box should now be signed with the private key you just created.
Step 4: start GPG agent at logon
I don't know why, but sometimes my GPG agent is not running. So I added a small startup script that triggers the loading of the agent.
& {
    $TaskName = "Start GPG"
    $CurrentUser = [System.Security.Principal.WindowsIdentity]::GetCurrent().Name

    # Check if the task already exists
    if (Get-ScheduledTask -TaskName $TaskName -ErrorAction SilentlyContinue) {
        Write-Output "Task '$TaskName' already exists. Deleting it first..."
        Unregister-ScheduledTask -TaskName $TaskName -Confirm:$false
    }

    # Define the action, trigger, and settings
    $Action = New-ScheduledTaskAction `
        -Execute 'PowerShell.exe' `
        -Argument "-NoProfile -WindowStyle Hidden -Command `"echo 'Ensure GPG...'; gpg-connect-agent reloadagent /bye; sleep 5;`""

    $Trigger = New-ScheduledTaskTrigger -AtLogOn -User $CurrentUser
    $Settings = New-ScheduledTaskSettingsSet `
        -AllowStartIfOnBatteries `
        -DontStopIfGoingOnBatteries `
        -StartWhenAvailable

    # Register the new task
    Register-ScheduledTask `
        -Action $Action `
        -Trigger $Trigger `
        -TaskName $TaskName `
        -Description "Ensures GPG agent is reloaded at user logon." `
        -Settings $Settings

    Write-Output ""
    Write-Output "Task '$TaskName' created successfully."
}
When the agent is not loaded, you'll be waiting for that popup for a long time before it times out.
Bonus: Visual Studio Code GPG signing
To enable GPG signing in Visual Studio Code, you'll need to set git.enableCommitSigning to true:
- Press F1 to open up the all commands view.
- Input >Preferences: Open Settings (UI).
- Search git.enableCommitSigning.
- Enable the Git: Enable Commit Signing to enable the commit signing.
Bonus: Dev Containers
The latest version of Gpg4win will not work with Dev Containers, because they've switched keyrings (more info here). The solution is to migrate back to the "old" keychain with the following command:
gpg-disable-keyboxdWhen you get the error "error: cannot run C:\Program Files (x86)\Gpg4win..\GnuPG\bin\gpg.exe: No such file or directory", you can solve this by overwriting the GPG program in your container:
# config local GPG for signing
# fixes:
# - error: cannot run C:\Program Files (x86)\Gpg4win..\GnuPG\bin\gpg.exe: No such file or directory.
git config --global gpg.program gpg
More information on the startup script and dev container can be found here.
Changelog
- Make the task start regardless if the laptop is on batteries or not.
- Added steps as headings.
- Added a fix for the new Gpg4win keyring causing Dev Containers not to work.
- Initial article.