

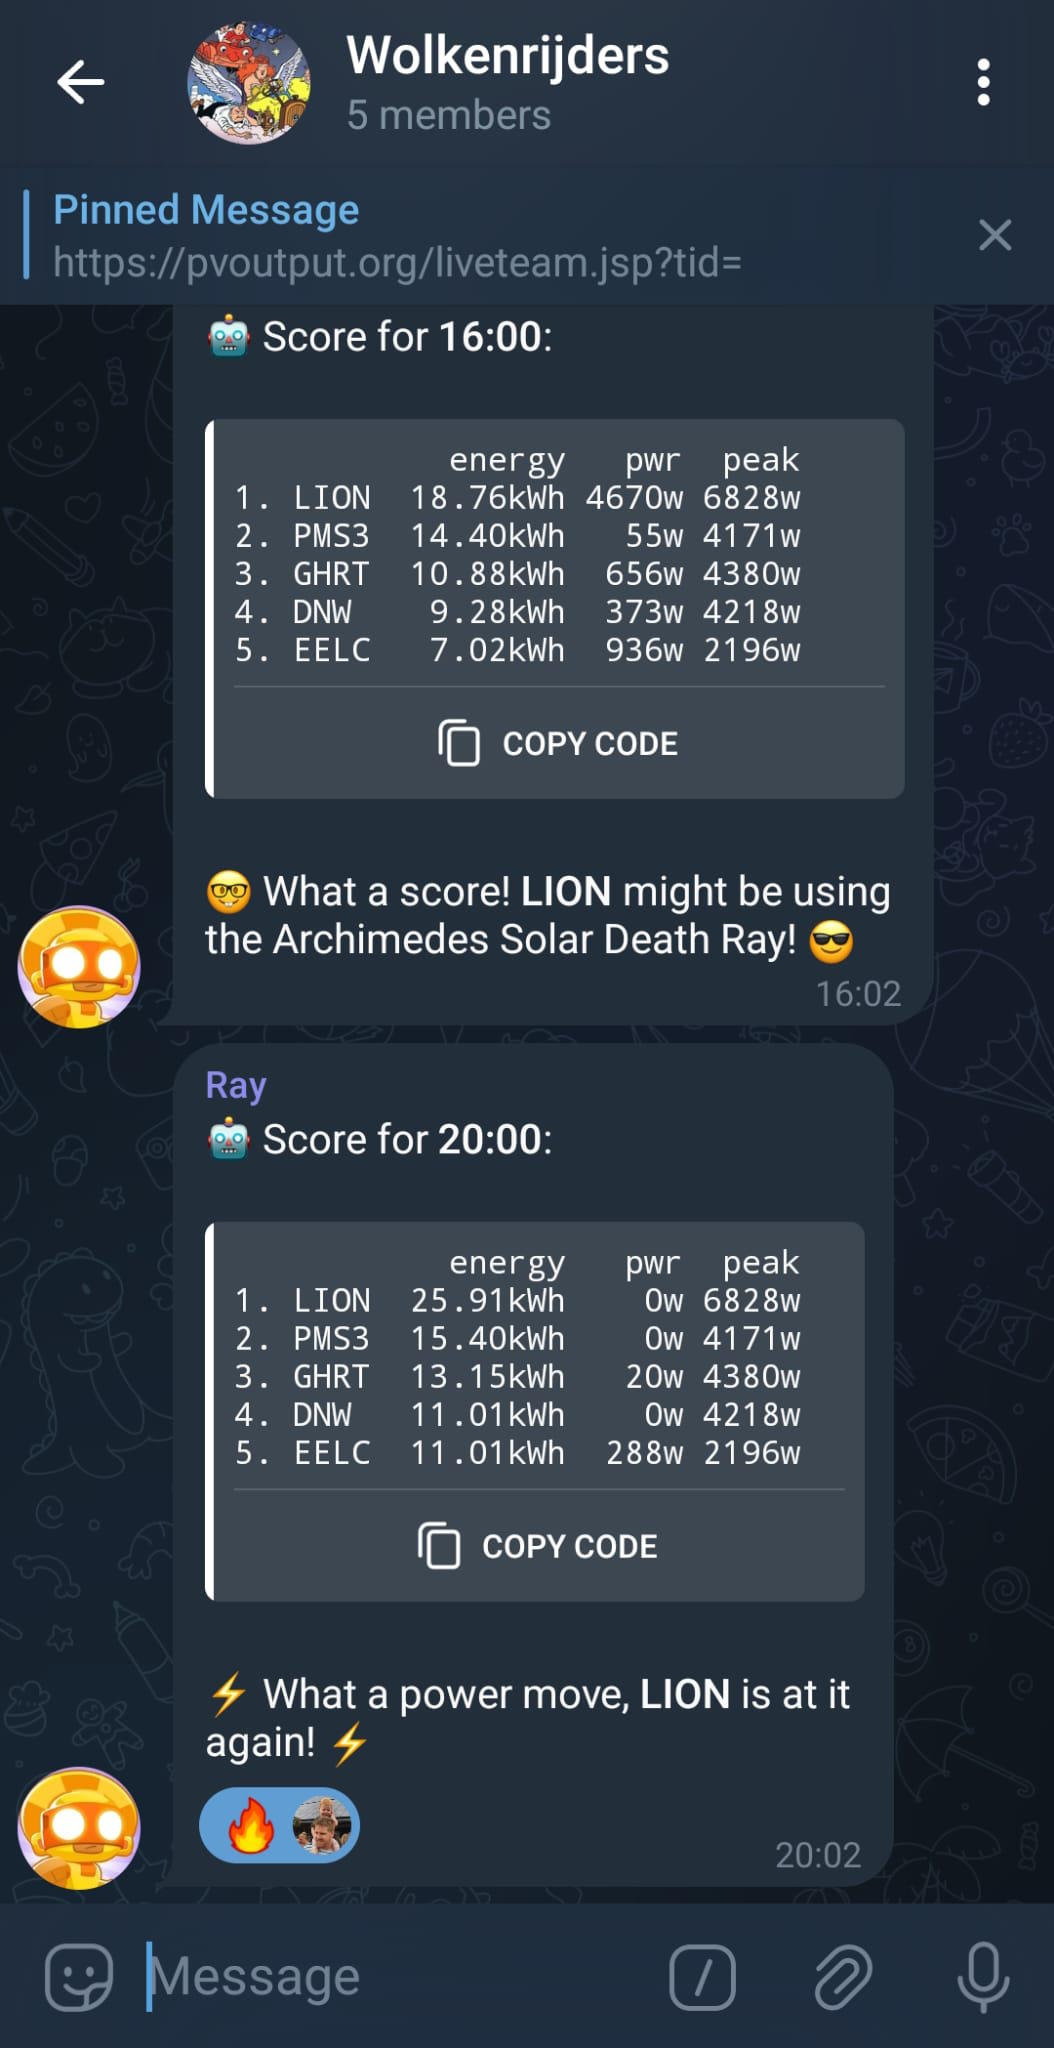
Last year, I got some Zonneplan solar panels. My colleagues and I got hooked on comparing stats, so we decided to upload our solar panel stats to PVOutput and build a Telegram bot to keep score:
As a .NET developer, I built a .NET application that connected to the Zonneplan API and posted the data to PVOutput every 5 minutes. It worked, but I couldn’t achieve a stable performance. Whenever there was a hiccup, I would lose the key and have to reconnect. Therefore, I decided to migrate my setup to Home Assistant.
Apparently the automation definition has changed in Home Assistant. The code is now compatible with Home Assistant version 2024.10.3.
What's the idea?
We'll do this:
- Add the Zonneplan integration.
- Add Visual Studio Code add-on.
- Use
secrets.yamlto store the PVOutput API Key and SystemId. - Use
configurations.yamlto add a RESTful command that sends the Zonneplan sensor data to PVOutput. - Use
automations.yamlto trigger the command. - Restart & enjoy.
The beauty of this way is that you don't need Bash or Python, it is just YAML.
Home Assistant + Zonneplan
The first step is to install the Zonneplan integration in your Home Assistant. Make sure HACS is installed and add the repository https://github.com/fsaris/home-assistant-zonneplan-one, by hitting this button:

After restarting your Home Assistant, you can set up the integration, by hitting this button:
After completing the setup, you'll see data flowing in. More information can be found here.
Preparation: install VS Code in Home Assistant
We're going to edit some Home Assistant YAML files, so it is nice to have a good editor. Let's install Visual Studio Code into your Home Assistant by hitting this button:
Secrets
First, we need to add some secrets, so let's click on the Studio Code Server tab to and open the secrets.yaml. Here we'll add the secrets for our PVOutput call:
pvoutput_api_key: 003044-your-pvoutput-api-key-92aa93
pvoutput_system_id: 1244-your-system-id-234
Command
Next, you'll need to add the command to configuration.yaml and add the command. We're going to fire an addstatus.jsp request. The docs specify the following parameters:
- v1 = energy generation in watt hours
- v2 = power generation in watts
Notice how Zonneplan will return zonneplan_yield_today in kWh, so we need to multiply with 1000 to convert the value to watts.
Paste the following to your configuration.yaml:
rest_command:
  post_pvoutput_data:
    url: "https://pvoutput.org/service/r2/addstatus.jsp"
    method: POST
    headers:
      X-Pvoutput-Apikey: !secret pvoutput_api_key
      X-Pvoutput-SystemId: !secret pvoutput_system_id
    payload: >
      {{
        "d=" ~ now().strftime('%Y%m%d') ~
        "&t=" ~ now().strftime('%H:%M') | urlencode ~
        "&v1=" ~ states('sensor.zonneplan_yield_today') | float * 1000 | int ~
        "&v2=" ~ states('sensor.zonneplan_one_omvormer_last_measured_value') | int
      }}
    content_type: "application/x-www-form-urlencoded"
Trigger
Last but not least, we'll need to create something that triggers the command. Let's trigger before and after sunset. PVOutput allows us to upload something every 5 minutes, so let's stick to that. Let's offset the time with 20 seconds to make sure we have received the update from Zonneplan.
These stats lead to the following automation:
- id: post_to_pvoutput
  alias: "Post to Zonneplan every 5 minutes during the day."
  trigger:
    - trigger: time_pattern
      minutes: "/5"
      seconds: 20
  condition:
    - condition: sun
      before: sunset
      before_offset: "00:30:00"
    - condition: sun
      after: sunrise
      after_offset: "-00:30:00"
  actions:
    - action: rest_command.post_pvoutput_data
Note: adding an id makes the automation editable in the Home Assistant UI.
All you now need to do is restart your Home Assistant and you'll be done.
Debugging
Debugging a rest command is a pain in the ***. We have some options in Home Assistant to see what's going on.
- Logs: Settings > System > Logs.
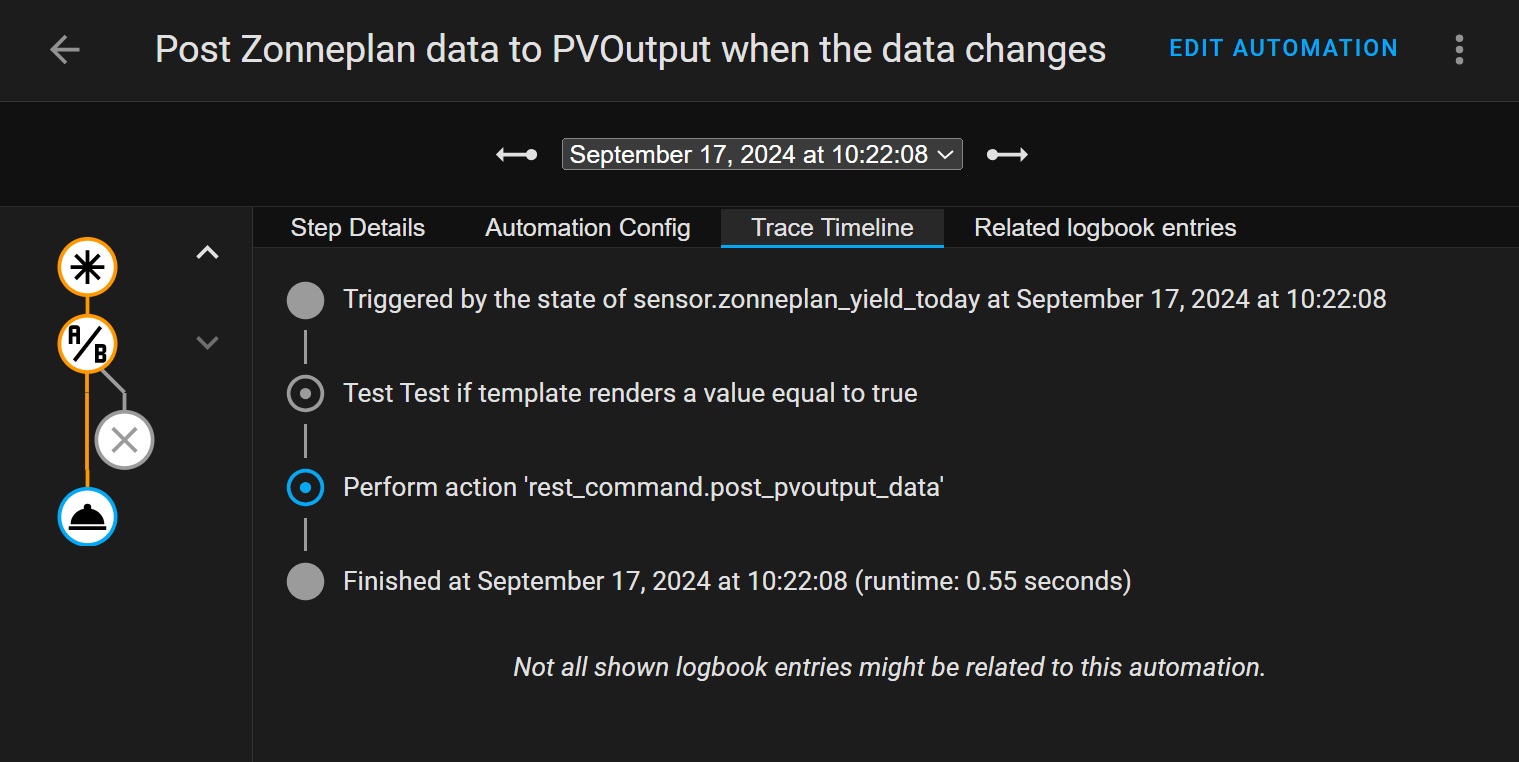
- Automation traces: trace every run with a nice UI, go to Settings > Automations & Scenes > Post Zonneplan data to PVOutput when the data changes > Traces (top right corner):
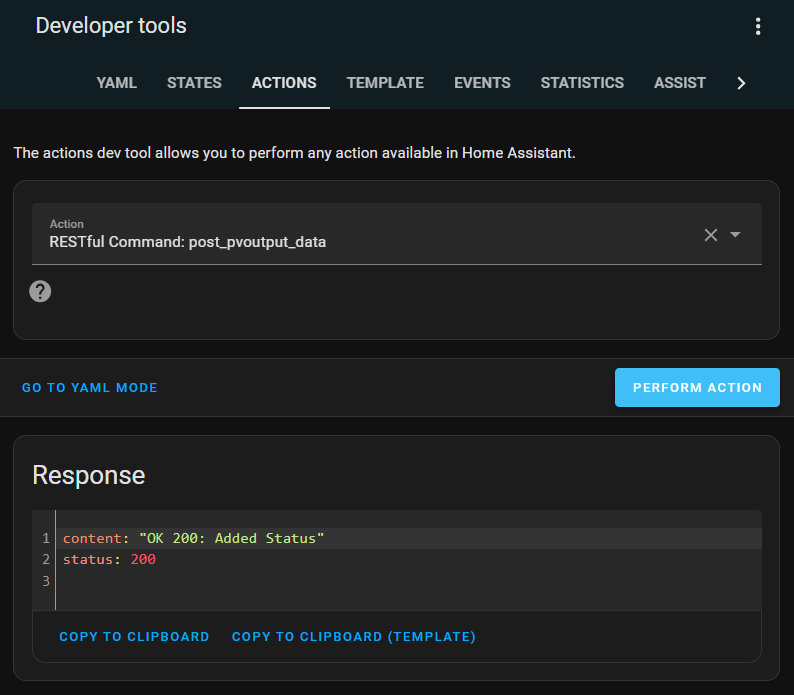
- Command: If you want to trigger the command, you can execute it from the UI as well. Navigate to Developer Tools > Actions > RESTful Command: post_pvoutput_data and hit the Perform Action button.
Changelog
- This code works with the new automation definition of Home Assistant version
2024.10.3. - Changed the trigger to a cron to make an easier setup.
- Changed the command into a multi-line command using
~templating. - Added debug sections.
- Initial article.