

When I build containerized apps that need to be exposed on the internet, I usually need to forward ports, configure Let's Encrypt, and reverse-proxy the app. In this blog, I'll show you how to ditch all of that in favor of one secure Cloudflare Tunnel in a Docker Compose file.
Part 1: Setting Up the App
First, let's create and configure our state-of-the-art app, named index.html:
<html>
<head>
<meta charset="utf-8" />
<meta name="viewport" content="width=device-width, initial-scale=1.0" />
</head>
<body>
<h1>🤓 Hello world! 👋</h1>
<p>Answer from container.</p>
</body>
</html>
We'll host it using the latest standard NGINX container. The docker-compose.yml looks like this:
services:
  web:
    image: nginx:latest
    volumes:
      - ./index.html:/usr/share/nginx/html/index.html
    restart: unless-stopped
Notice how we are not exposing port 80 to the host!
Part 2: Setting Up the Cloudflare Tunnel
To set up a Cloudflare Tunnel for your app, follow Cloudflare's guide for creating a tunnel through the Cloudflare dashboard. Open Networking > Tunnels, select Create a tunnel, and give your tunnel a name.
Select Docker as the environment. Cloudflare will show a command containing --token. Copy the token; we'll run it through Docker Compose in the next step.
Part 3: Include the Tunnel as a Service
Now that we've created our tunnel, we can configure it on our server. Let's create a tunnel.env file to separate the token from our docker-compose.yml file:
TUNNEL_TOKEN=<PASTE_TOKEN_HERE>The tunnel token is a credential: anyone who has it can run the tunnel. Keep tunnel.env on the server, add it to .gitignore, restrict its file permissions, and rotate the token if it is ever exposed.
And now we can add the cloudflared service to our Docker Compose file like this:
services:
  web:
    image: nginx:latest
    volumes:
      - ./index.html:/usr/share/nginx/html/index.html
    restart: always
    container_name: web

  tunnel:
    image: cloudflare/cloudflared:latest
    command: tunnel --no-autoupdate run
    env_file: tunnel.env
    restart: always
    container_name: tunnel
    depends_on:
      - web
Now you can run the stack with docker compose up -d.
Part 4: Publish and Verify the App
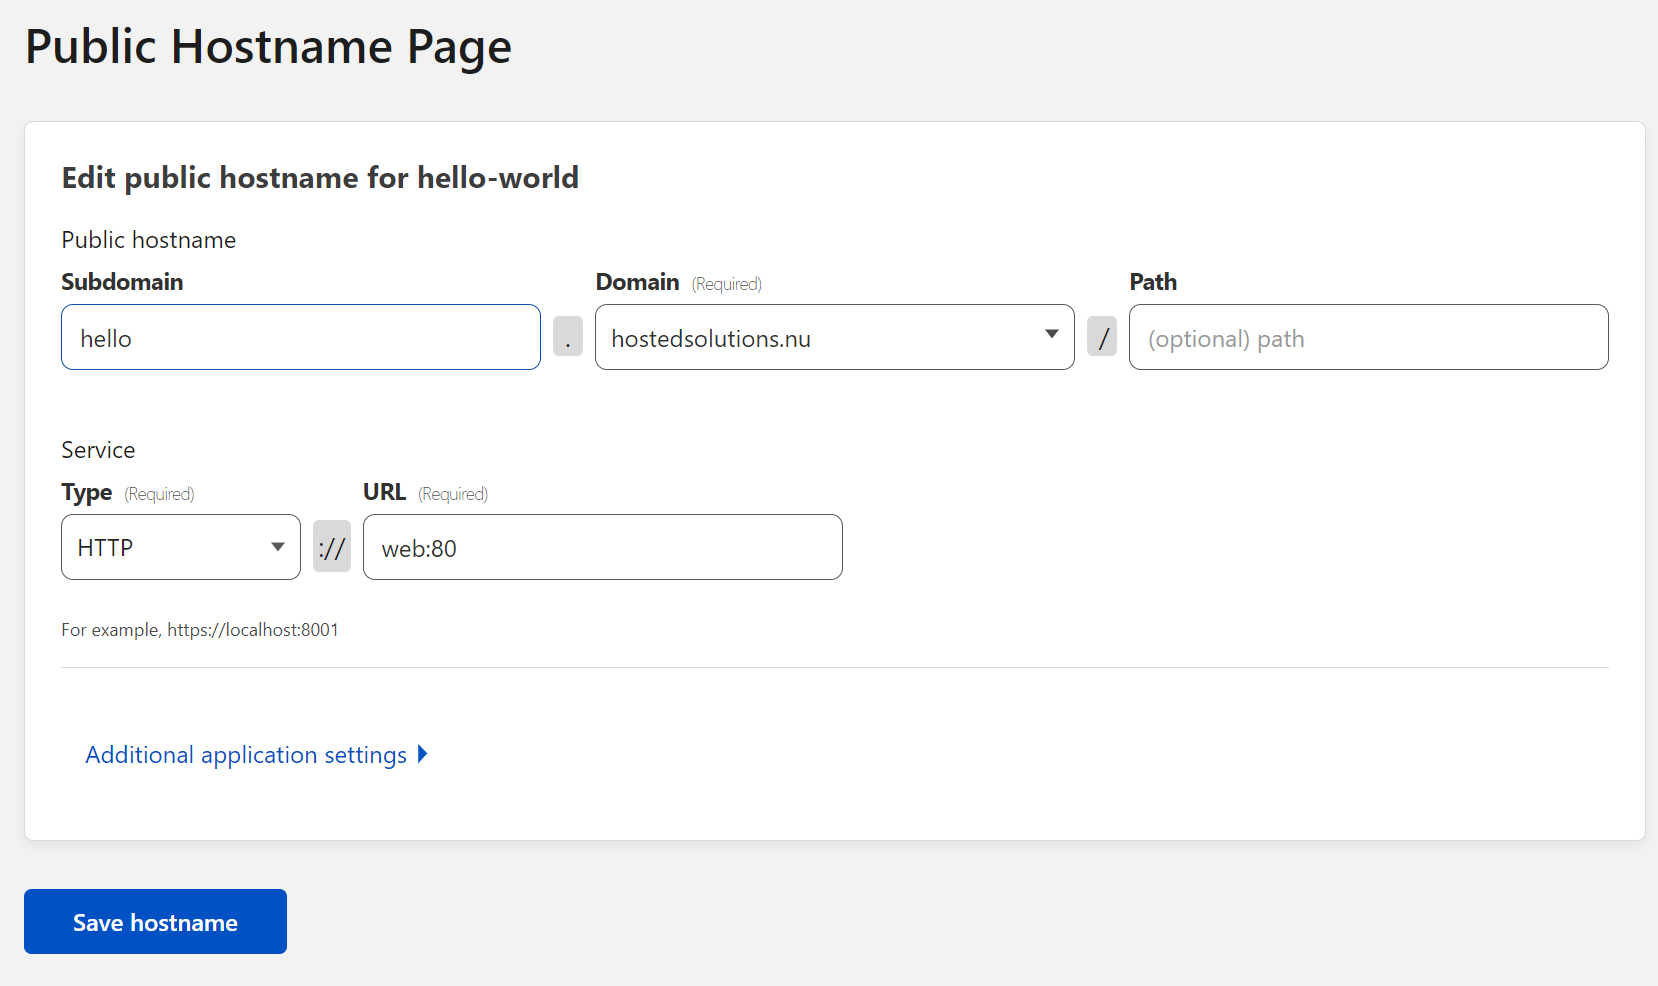
Return to your tunnel in the Cloudflare dashboard. On the Routes tab, add a Published application route. Choose the public hostname for your app and enter http://web:80 as its Service URL. The web part refers to the service named web in our docker-compose.yml file.
Check that both services are running:
docker compose psIf the tunnel does not become healthy, inspect its logs:
docker compose logs tunnelFinally, open the public hostname in your browser. You should see the hello-world page served by the NGINX container.
Conclusion
Cloudflare. Tunnels. Are. Easy! And they are free. What I like about this setup:
- A tunnel provides a secure, outbound-only connection between Cloudflare and your application.
- You don't need to set up port forwarding for this to work. No more adding your server's IP address to public DNS.
- You don't need a reverse proxy for this to work.
- You don't need Let's Encrypt certificates for this to work.
- You don't even need to expose any ports to your host (which I super love 😍).
- You can create a specific tunnel per application by just adding the
cloudflaredservice to your Docker Compose stack.
Changelog
- Updated the Cloudflare dashboard workflow, token security guidance, Docker Compose configuration, and verification steps.
- Added container names for more predictable naming of the stack (without the numbering). Removed quotation from the YAML files.
- Initial article.