

I've created a small application in .NET Core 2.0 that needs to run periodically on my Raspberry Pi 3. I got tired of copying the binaries to the Pi, so I build a small CI/CD pipeline that will build, test and deploy the application automatically. I've chosen Bitbucket because they allow me to have free private repositories for small teams.

The parts
My setup has the following parts:
| Development setup | CI/CD setup | Pi setup |
|---|---|---|
| .Net Core 2.0 / C# Visual Studio 2017 Git repo using Bitbucket | Bitbucket Pipeline (yml) Bitbucket Downloads Optional: Tweet when done |
Raspbian Light Stretch
Crontab / bash to update & run app |
So I basically develop op my laptop. I use the pipeline to do an automatic build upon a commit. The pipeline test and store the result in the downloads. The Raspberry Pi will pull the latest binaries from the downloads, unzip it and install it. I also send myself a Tweet when the build is done.
Assumptions
The pipeline assumes the following project structure in Git:
+--- src
|    |
|    +--- MyProject
|         |
|         +--- my-project.sh  //(deployment file)
|
+--- test
|    |
|    +--- UnitTest1
|    |
|    +--- UnitTest2
|
+--- bitbucket-pipelines.yml
|
+--- .gitignore
Unit test projects are presumed to have the word UnitTest in them and to be present in the test directory. The deployment assumes the following directory on the Raspberry Pi:
+--- home
     |
     +--- pi
          |
          +--- projects
          |    |
          |    +--- my-project
          |
          +--- my-project.sh
The my-project.sh script will be used to schedule execution of the update of the program. In my case it will run the program as well.
Peparations
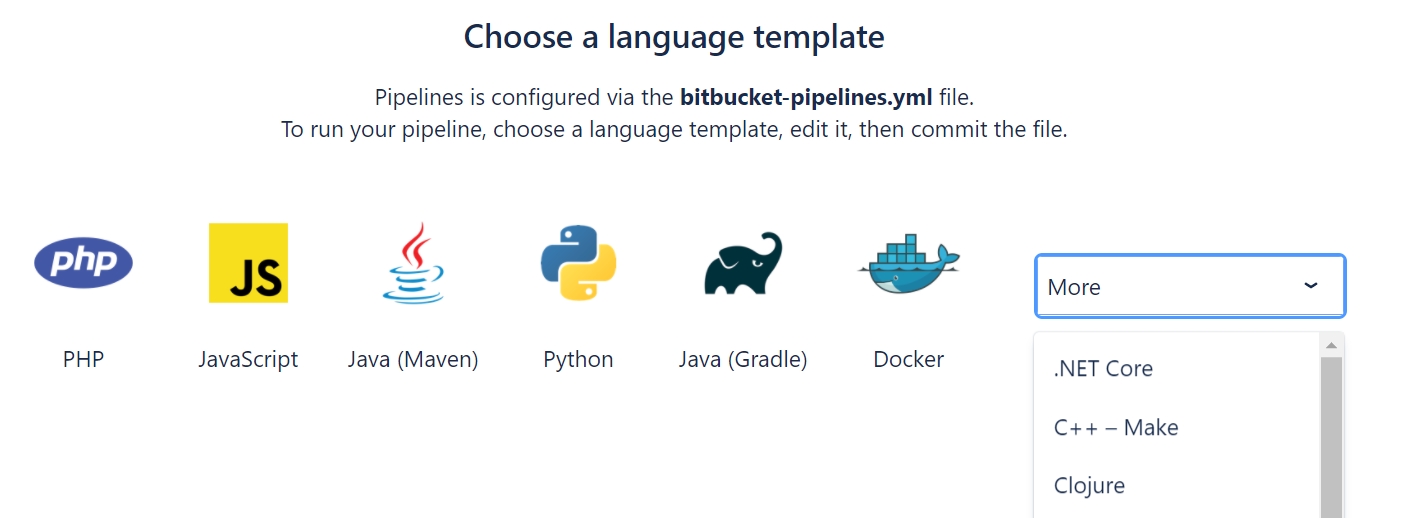
We need to create a pipeline. Go to Repositories > your repository > Pipelines. Choose the .NET Core pipeline from the select box.
This will add a .yml file to your project. We will edit this file later.
Downloads access
The pipeline will add zip to your downloads. It needs an app password to do this. You'll need to generate one the following way:
- Login to Bitbucket
- Click on your Avatar in the bottom-left corner > Bitbucket settings
- Access management > App passwords > Create app password
- Add a label and enable Repositories \ write
- Click the Create button
- Hold on to the password, we're going to use it soon.
Twitter access
Next you'll need to go to Twitter and create an app (apps.twitter.com) and generate a consumer key, consumer secret, user access key and user access secret. Don't know how to do it? Just use this ;-).
Environment variables
Open up the environment variables by going to Repositories > your repository > Settings > Pipelines > Environment variables. Here we add the information of the previous steps:
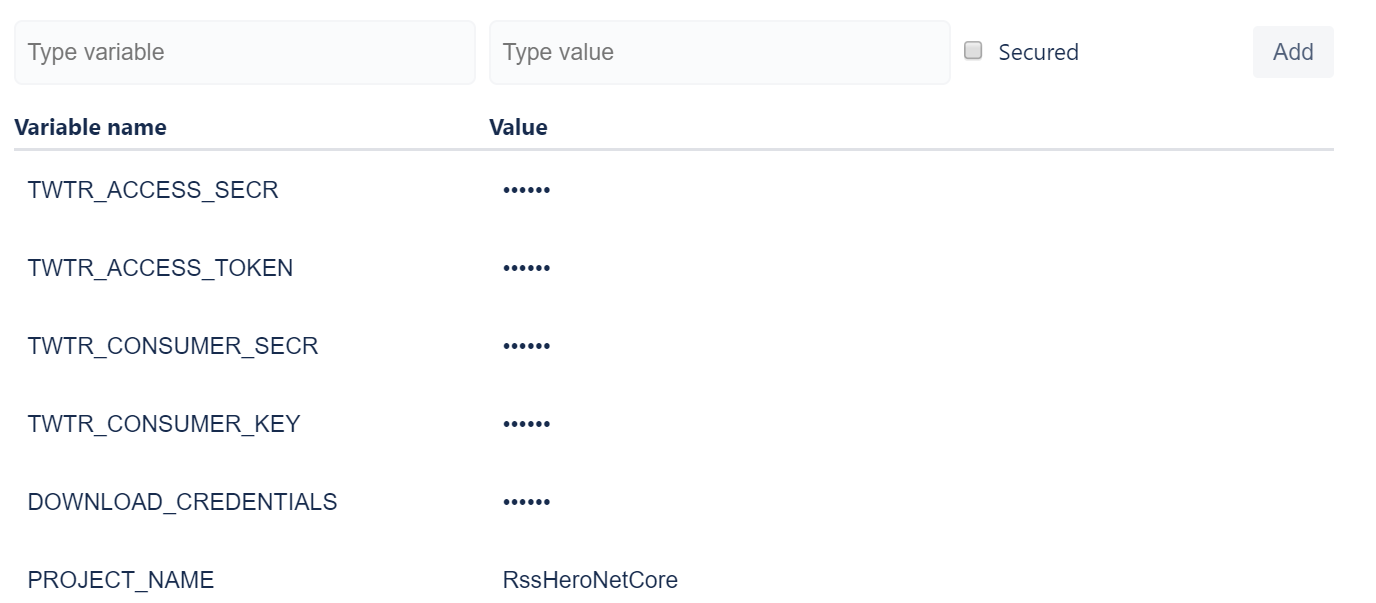
The PROJECT_NAME variable will be used by the script to build the main project. It will also be used to generate a zip.
The CI pipeline
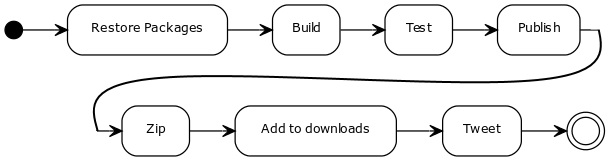
A picture says more than a thousand words. This activity diagram shows the steps we're going to take.
Let's edit the yml file. Go to Repositories > your repository > source > bitbucket-pipelines.yml and hit the edit button. Add the following code:
#get the latest .Net container
image: microsoft/dotnet:latest

pipelines:
    default:

    - step:
        name: Build, test and publish
        caches:
            - dotnetcore
        script:

            #some variables
            - export PROJECT_SRC=./src/${PROJECT_NAME}
            - export ZIP=dist/${PROJECT_NAME}.zip
            - mkdir dist

            #1. restore packages in the project
            - dotnet restore $PROJECT_SRC

            #2. build the project
            - dotnet build $PROJECT_SRC

            #3. run test projects
            - for x in $(find -wholename *UnitTest*.csproj) ; do dotnet test $x ; done

            #4. publish the project -> this will create the directory with all the DLL's
            - dotnet publish $PROJECT_SRC -c Release

            #5. let's install some utilities
            - apt-get update
            - apt-get -qq install apt-utils
            - apt-get -qq install zip

            #6. Zip the publish directory
            - zip -j -r $ZIP $PROJECT_SRC/bin/Release/netcoreapp2.0/publish

        artifacts:
            - dist/**

    - step:
        name: Deployment
        script:

            #some variables
            - export ZIP=dist/${PROJECT_NAME}.zip

            #7. Add to downloads
            - curl -X POST --user "${DOWNLOAD_CREDENTIALS}" "https://api.bitbucket.org/2.0/repositories/${BITBUCKET_REPO_OWNER}/${BITBUCKET_REPO_SLUG}/downloads" --form files=@"$ZIP" -sS

    - step:
        name: Tweet success
        script:

            #install Tweet
            - curl -L -o tweet https://github.com/vmchale/command-line-tweeter/releases/download/v4.0.1/tweet-linux -sS
            - cp tweet /usr/local/bin/tweet
            - chmod 755 /usr/local/bin/tweet

            #add credentials
            - echo "api-key:${TWTR_CONSUMER_KEY}" >> twitter.cred
            - echo "api-sec:${TWTR_CONSUMER_SECR}" >> twitter.cred
            - echo "tok:${TWTR_ACCESS_TOKEN}" >> twitter.cred
            - echo "tok-sec:${TWTR_ACCESS_SECR}" >> twitter.cred
            - cat twitter.cred

            #tweet
            - tweet --cred twitter.cred send "@${TWTR_HANDLE}, a new build of ${PROJECT_NAME} is ready."
The pipeline will be executed when something is committed to the repository. If you want to validate your yml you can use the validator. A docker container from Microsoft will be used.
The CD script
Now that we have created the CI part, let's create the CD part. Login to the terminal of your pi and create a new script with nano /home/pi/my-project.sh and fill it with the following content:
#!/bin/sh

let LOCAL_NAME='my-project'
let CSPROJ_NAME='MyProject'
let BITBUCKET_REPO_OWNER='YourAccountName'
let BITBUCKET_REPO_SLUG='my-repo'
let BITBUCKET_AUTH='YourAccountName:G3n3r@t3dAppP@ssword'

#create projects
mkdir -p /home/pi/projects
cd /home/pi/projects

#remove previous version
rm -rf $LOCAL_NAME

#create project directory
mkdir $LOCAL_NAME
cd $LOCAL_NAME

#download the project
echo "Downloading new version..."
curl --user $BITBUCKET_AUTH -L -O https://api.bitbucket.org/2.0/repositories/$BITBUCKET_REPO_OWNER/$BITBUCKET_REPO_SLUG/downloads/$CSPROJ_NAME.zip -sS

#unzip
echo "Unzipping..."
unzip $CSPROJ_NAME.zip
Adjust the variables LOCAL_NAME, CSPROJ_NAME, BITBUCKET_REPO_OWNER, BITBUCKET_REPO_SLUG and BITBUCKET_AUTH. You can generate a new app password for your deployment script in the same way as you did for the pipeline (note: it only needs read access).
If you want to run the program as well, you can add the following:
#run it
echo "Running..."
dotnet --fx-version 2.0.4-servicing-25824-03 $CSPROJ_NAME.dll
Save and exit the file (ctrl+x).
Make the script executable by doing a: chmod +x /home/pi/my-project.sh. This is needed for the crontab to run the script as it only executes executable scripts. You can check if the script works by running it: bash /home/pi/my-project.sh.
Schedule update using crontab -e
Scheduling the script is easy. Run the following: crontab -e. This will open up the editor. Add the following lines:
# Export the path so that the scripts run correctly
PATH=/usr/local/sbin:/usr/local/bin:/sbin:/bin:/usr/sbin:/usr/bin:/opt/aws/bin:/root/bin

0,10,20,30,40,50 * * * * /home/pi/my-project.sh > /home/pi/my-project.log 2>&1
This will update the program every 10 minutes.
That's it! Sit back and relax. Every 10 minutes your app will be updated.
Hi,
I am in need of similar kind of deployment. Bit bucket with Azure Web App. Am facing an issue in configuring the .yml file with the project in bit bucket. Project is in sub folder of root folder and there is no article which details of how to mention sub folder path to build and execute. Can you please help me here ?
My .sln is in after two sub folders after src (root).
Structure is:
src
Folder1
Folder2
Folder3
Folder4
.sln file
And .yml file is located just under src.