# Expose a Docker Compose App with a Secure Cloudflare Tunnel
**Date:** 2023-01-16
**Author:** Kees C. Bakker
**Categories:** Automation, Cloudflare
**Tags:** Docker
**Original:** https://keestalkstech.com/expose-docker-compose-app-with-a-secure-cloudflare-tunnel/

---
When I build containerized apps that need to be exposed on the internet, I usually need to forward ports, configure Let's Encrypt, and reverse-proxy the app. In this blog, I'll show you how to ditch *all of that* in favor of [one secure Cloudflare Tunnel](https://blog.cloudflare.com/tunnel-for-everyone/) in a Docker Compose file.
## Part 1: Setting Up the App
First, let's create and configure our state-of-the-art app, named `index.html`:
```html
🤓 Hello world! 👋
Answer from container.
```
We'll host it using the latest standard [NGINX container](https://hub.docker.com/_/nginx). The `docker-compose.yml` looks like this:
```yml
services:
web:
image: nginx:latest
volumes:
- ./index.html:/usr/share/nginx/html/index.html
restart: unless-stopped
```
Notice how we are **not** exposing port 80 to the host!
## Part 2: Setting Up the Cloudflare Tunnel
To set up a Cloudflare Tunnel for your app, follow Cloudflare's guide for [creating a tunnel through the Cloudflare dashboard](https://developers.cloudflare.com/cloudflare-one/networks/connectors/cloudflare-tunnel/get-started/create-remote-tunnel/). Open [Networking > Tunnels](https://dash.cloudflare.com/?to=/:account/tunnels), select **Create a tunnel**, and give your tunnel a name.
Select Docker as the environment. Cloudflare will show a command containing `--token`. Copy the token; we'll run it through Docker Compose in the next step.
## Part 3: Include the Tunnel as a Service
Now that we've created our tunnel, we can configure it on our server. Let's create a `tunnel.env` file to separate the token from our `docker-compose.yml` file:
```env
TUNNEL_TOKEN=
```
The tunnel token is a credential: anyone who has it can run the tunnel. Keep `tunnel.env` on the server, add it to `.gitignore`, restrict its file permissions, and rotate the token if it is ever exposed.
And now we can add the `cloudflared` service to our Docker Compose file like this:
```yml
services:
web:
image: nginx:latest
volumes:
- ./index.html:/usr/share/nginx/html/index.html
restart: always
container_name: web
tunnel:
image: cloudflare/cloudflared:latest
command: tunnel --no-autoupdate run
env_file: tunnel.env
restart: always
container_name: tunnel
depends_on:
- web
```
Now you can run the stack with `docker compose up -d`.
## Part 4: Publish and Verify the App
Return to your tunnel in the Cloudflare dashboard. On the **Routes** tab, add a **Published application** route. Choose the public hostname for your app and enter **http://web:80** as its **Service URL**. The *web* part refers to the service named *web* in our `docker-compose.yml` file.
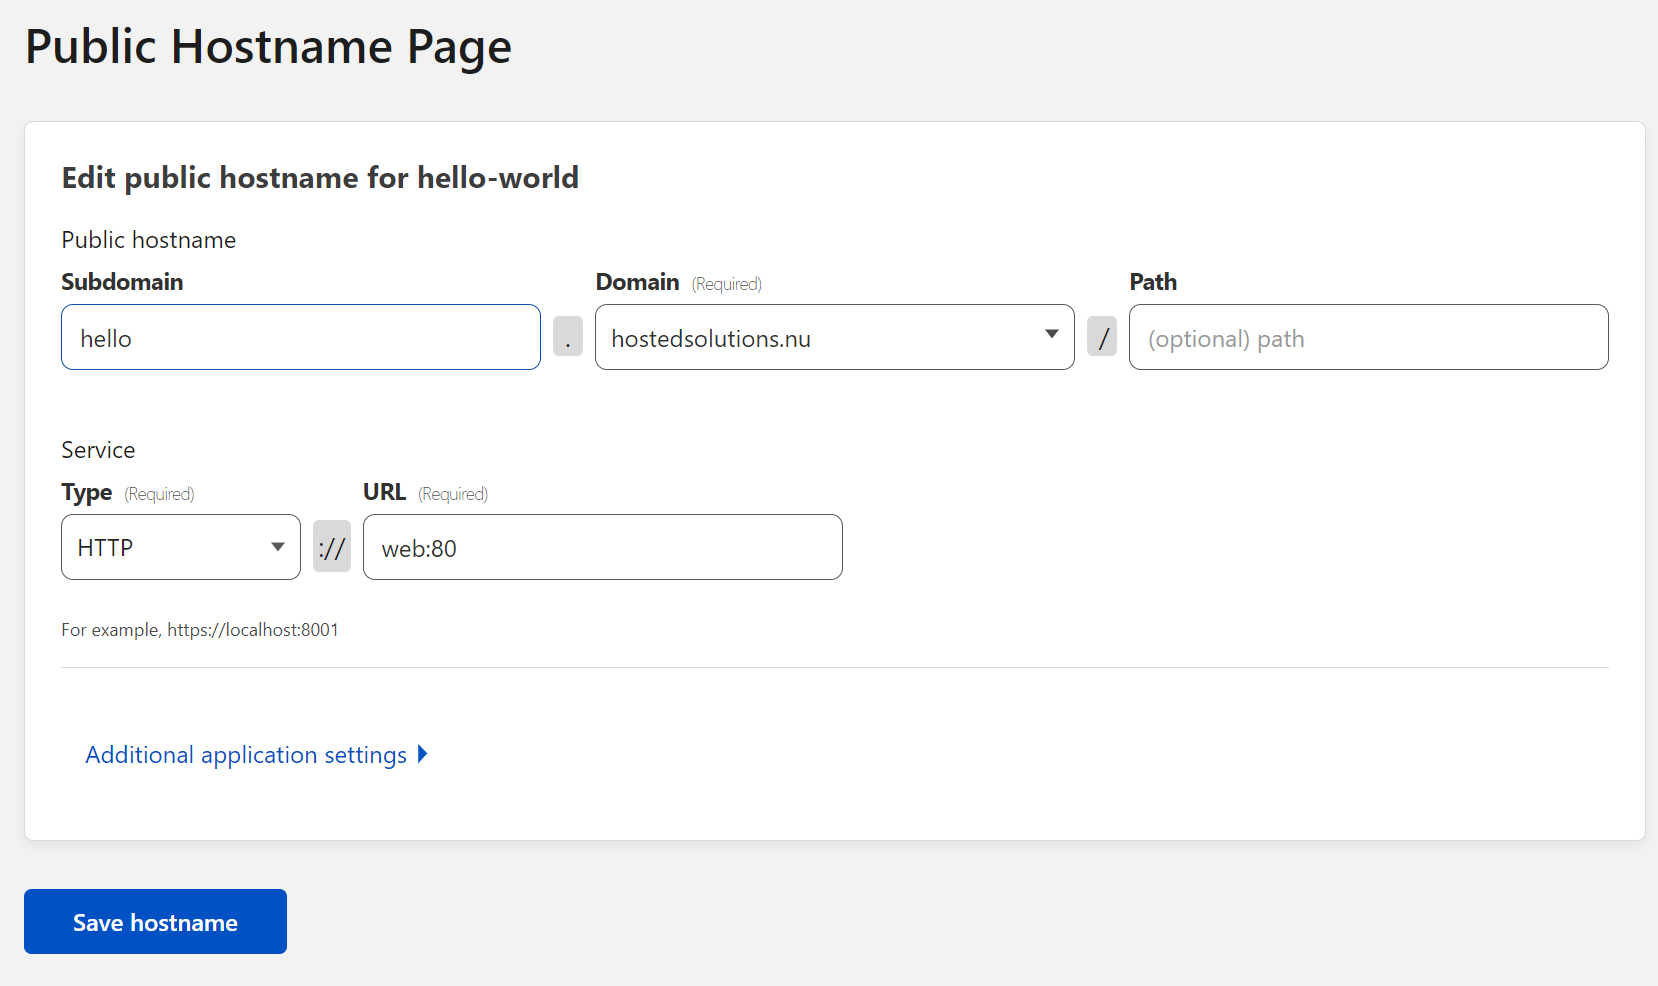
*The tunnel should be mapped to http://web:80.*
Check that both services are running:
```sh
docker compose ps
```
If the tunnel does not become healthy, inspect its logs:
```sh
docker compose logs tunnel
```
Finally, open the public hostname in your browser. You should see the hello-world page served by the NGINX container.
## Conclusion
**Cloudflare. Tunnels. Are. Easy!** And they are [free](https://blog.cloudflare.com/tunnel-for-everyone/). What I like about this setup:
- A tunnel provides a secure, outbound-only connection between Cloudflare and your application.
- You **don't need** to set up **port forwarding** for this to work. No more adding your server's IP address to public DNS.
- You **don't need** a **reverse proxy** for this to work.
- You **don't need** **Let's Encrypt** certificates for this to work.
- You **don't** even **need** to **expose** any **ports** to your **host** (which I super love 😍).
- You can create a specific tunnel per application by just adding the `cloudflared` service to your Docker Compose stack.
## Changelog
- 2026-07-19: Updated the Cloudflare dashboard workflow, token security guidance, Docker Compose configuration, and verification steps.
- 2023-05-14: Added container names for more predictable naming of the stack (without the numbering). Removed quotation from the YAML files.
- 2023-01-16: Initial article.